
Buying your first home in Australia is one of the biggest financial decisions you'll ever make, and one of the most confusing. There are dozens of moving parts, and missing even one of them can cost you thousands of dollars or set you back months.
We built NestPath because the only first-home-buyer checklists out there belong to banks, brokers and law firms who all want something from you at the end of it. This one doesn't. It's free, it's independent, and it's written for the person doing the buying. Below is every step from saving your deposit to collecting the keys, in the order it actually happens. Expect the whole thing to take 9 to 14 months from the day you start sorting your finances. Treat the timing as a guide, not a deadline. The right pace is whatever lets you decide things calmly, with the RBA cash rate sitting at 4.35% (after the 5 May 2026 hike) and lenders still serviceability-testing you at your rate plus 3%.
Your printable quick checklist
Here's the whole journey on one screen. Print it, screenshot it, or tick it off as you go. Each line links to the detailed stage further down.
Months 1 to 3, Get your money ready
- ☐ Set up or top up your First Home Super Saver (FHSS) contributions
- ☐ Pay down or close credit cards and buy-now-pay-later accounts
- ☐ Pull and check your credit file
- ☐ Start a genuine-savings habit in a separate account
- ☐ Get an honest borrowing-power estimate
Months 3 to 6, Research
- ☐ Shortlist 3 to 5 suburbs and compare the fundamentals
- ☐ Attend open inspections as research (not buying yet)
- ☐ Learn the auction vs private-treaty rules in your state
- ☐ Pick your conveyancer before you need them
Month 6, Pre-approval
- ☐ Match with a broker
- ☐ Submit a full pre-approval with all your documents
- ☐ Check the expiry date and don't burn the clock
- ☐ Confirm your First Home Guarantee eligibility
The hunt (2 to 3 months), Inspect and offer
- ☐ Inspect properly and look hard for faults
- ☐ Check flood, bushfire and zoning risk for the area
- ☐ Get every contract reviewed before you offer or bid
- ☐ Book a building and pest inspection
- ☐ Make any offer subject to finance and inspection where you can
- ☐ Negotiate from the inspection findings
Settlement (30 to 90 days), Close it out
- ☐ Get formal (unconditional) loan approval
- ☐ Take out home insurance from settlement day
- ☐ Check the settlement adjustments
- ☐ Do the final pre-settlement inspection
- ☐ Collect the keys
After settlement, Settle in
- ☐ Switch utilities into your name
- ☐ Set up rates and any strata direct debits
- ☐ Redirect your mail with Australia Post
- ☐ Lodge any First Home Owner Grant application
- ☐ Diary a refinance review for 24 months out
What it all costs upfront
Budget for roughly $5,000 to $25,000 in upfront costs beyond your deposit, and more if you're not eligible for a first-home stamp-duty concession. The deposit is the big one, but it isn't the only cheque you'll write before you get the keys. Here's what to budget for so nothing blindsides you.
| Cost | Typical range | Notes |
|---|---|---|
| Deposit | 5%, 20% of price | 5% gets most first-home buyers in via the First Home Guarantee; 20% avoids LMI |
| Lenders Mortgage Insurance (LMI) | $10,000 to $40,000 | Only if your deposit is under 20% and you're not using the First Home Guarantee |
| Stamp duty | $0 to tens of thousands | Varies hugely by state; often $0 with a first-home concession, but not everyone qualifies |
| Building and pest inspection | $400 to $700 | Combined report |
| Conveyancing or legal fees | $1,000 to $2,500 | Depends on state and deal complexity |
| Removalist | $800 to $2,500 | By volume and distance |
| Utility connection | $150+ | Same-day fees if you leave it late |
A real example shows how wide the range runs. One Sunshine Coast first-home buyer's actual upfront bill, reported by Yahoo Finance Australia, came to about $34,231 before she got the keys, but $27,250 of that was stamp duty she paid because she wasn't eligible for a first-home exemption. If you do qualify for a concession, your stamp duty can be $0 and your total upfront bill far smaller, so treat it as an illustration of how much stamp duty can swing the figure, not a typical amount.
Run your own numbers with the LMI calculator and the stamp duty calculator for your state, and keep a running tally as you go with the deposit tracker so you know exactly how close you are. The move-in cost calculator pulls the purchase costs beyond the deposit into one figure.
The complete first home buyer checklist 2026, month by month
Most guides hand you a wall of steps with no sense of when each one happens. This is the chronological version: what to do, in what order, and roughly when.

Months 1 to 3: Financial setup
Start here: turn yourself into a clean, attractive borrower before a lender ever sees your name.
- Open or top up your First Home Super Saver (FHSS) contributions. You can salary-sacrifice up to $15,000 per financial year, capped at $50,000 in total, into super and pull it back out for your deposit, taxed at 15% on the way in instead of your marginal rate (ATO). Lodging contributions before 30 June 2026 captures another financial year. Read the full FHSS guide first.
- Clear or restructure consumer debt before you apply. Pay down credit cards, personal loans and any Afterpay, Zip or Humm balances. Lenders assess your credit limits, not your balances, so a $10,000 unused credit card can knock tens of thousands off what you can borrow (Compare the Market puts the hit at roughly $47,000 for an average earner). Close the cards you don't use.
- Pull your credit file early. Get free reports from Equifax, Experian and illion, and dispute any defaults, double-listings or telco strikes that shouldn't be there. A clean file three months before pre-approval gives the bureaus time to update.
- Lock in your deposit savings plan. Most lenders want at least three months of genuine savings, meaning regular deposits into one account, not a lump sum from family. Move it to a high-interest savings account with no card attached. Here's how much deposit you actually need.
- Get a borrowing-power estimate. Work out the figure you can repay without going house-poor, not the bank's headline number. The borrowing-power calculator shows both: the bank maximum and the comfortable amount.
- Check what you're eligible for. Before you fall for a place that's out of range, run the eligibility checker to see which schemes and concessions you qualify for.
Months 3 to 6: Property research
You're not buying yet. You're learning the market so you don't overpay when the right place turns up.
- Shortlist 3 to 5 target suburbs. Compare 12-month median price growth, days on market, vacancy rates, planned infrastructure and school catchments. The right suburb usually isn't the cheapest one you can afford; it's the one with the strongest fundamentals at the top of your range.
- Attend open inspections as research, not buying. Ten or more will show you what your budget actually buys in your suburb of choice. Don't bid yet, because you don't have pre-approval.
- Learn the auction vs private-treaty rules in your state. NSW, VIC and ACT are auction-heavy; QLD, WA, SA, TAS and NT lean private treaty. Auction wins are unconditional with no cooling-off; private-treaty contracts carry a cooling-off period in most states. Here's the full process by state.
- Ask the agent the right questions. How long has it been on the market, why is the seller moving, and are there any known issues? Honest answers and evasive ones both tell you something.
- Build agent relationships. Get on email alerts for your top three suburbs. Agents remember serious buyers who turn up consistently and ask sensible questions, and off-market opportunities flow through those relationships, not the listings sites.
- Pre-engage your conveyancer. Pick them now, not later. A good conveyancer turns around a contract review in 24 to 48 hours, and you don't want to be Googling for one the night before an auction. Here's what conveyancing actually covers, and you can find a conveyancer here.
Month 6: Pre-approval
Pre-approval (also called conditional approval) tells you how much a lender will lend before you start making offers. It's not a guarantee, but it gives you a real budget and shows sellers you're serious.
- Match with a broker. Brokers compare 30-plus lenders, are paid by the bank rather than by you, and know which lenders are currently flexible on casual income, self-employed buyers and low-deposit applications. Find a broker.
- Submit a full pre-approval application. Not a soft online estimate, but a formal assessment with two recent payslips, your latest Notice of Assessment, three months of bank statements, photo ID and details of every debt and credit-card limit. Expect 5 to 10 business days.
- Understand the validity period. Pre-approvals usually last 90 days (60 with some lenders). Don't burn it browsing; start serious offers inside the window or you'll have to re-document everything.
- Don't change your financial situation. Avoid switching jobs, taking on new debt or making large unexplained deposits while pre-approval is live, because any of those can make the lender reassess.
- Confirm your First Home Guarantee eligibility. The scheme is now called the Australian Government 5% Deposit Scheme (formerly the First Home Guarantee), and since 1 October 2025 it has had unlimited places and no income caps, letting eligible buyers in with a 5% deposit and no LMI (Housing Australia). It's checked at the lender level as part of your loan. The grants page lays out every 2026 scheme.
Help to Buy is a separate scheme, not part of the First Home Guarantee. Where the First Home Guarantee waives LMI on a 5% deposit, Help to Buy is a shared-equity program: the government co-owns part of the home with you. It launched in December 2025 with around 10,000 places a year and a deposit as low as 2%. From 1 July 2026 the income caps rose to $103,000 for singles and $165,000 for couples and single parents (they are indexed each 1 July). In return the government takes an equity share of up to 30% of an existing home or 40% of a new build, and you apply through a participating lender (firsthomebuyers.gov.au). You don't stack the two on the one purchase, and Help to Buy's eligibility is stricter, so weigh them as alternatives rather than a combo.
Active hunt and inspections (about 2 to 3 months)
Here's where what you look for in a house matters most, and the buyers who skip a proper inspection are the ones who end up regretting it. In a Compare the Market survey of around 1,004 Australians, 39% said they had at least one regret about their purchase, and 32% wished they'd looked harder for faults. A few careful hours now is the cheapest insurance you'll ever buy.
- Expect to inspect 20 to 30 properties before a serious offer. First-home buyers who buy the first or second thing they see usually overpay. Patience is the cheapest negotiating tool you have.
- Look hard for faults, inside and out. Check for damp, cracking, rising moisture, dodgy DIY wiring and a roof past its best. The most common buyer's regret is not looking closely enough, so take your time and bring a torch.
- Check flood, bushfire and zoning risk. Pull the area's flood and bushfire overlays and confirm the zoning before you fall for a place. A pretty house on a flood-prone block can be near-impossible to insure affordably.
- Get every contract reviewed before you offer or bid. Conveyancer turnaround is 24 to 48 hours. Never sign or bid on a property whose contract you haven't read with professional eyes; one missed easement, special condition or building order can cost $30,000 or more. Find a conveyancer.
- Read the vendor statement. Called a Section 32 in Victoria and different names elsewhere, this discloses everything the seller is legally required to tell you: title details, easements, rates, zoning and known defects.
- Book the building and pest inspection between contract and unconditional. Budget $400 to $700 for a combined report, and use a qualified, independent inspector. If it's an auction property, do this before auction day, because auction contracts are unconditional from the fall of the hammer. Find a building inspector.
- Inspect at different times. Visit on a weekday evening and a weekend morning to check noise, traffic, parking and how the light falls through the house.
- Make your offer subject to finance and inspection where you can. On a private-treaty purchase, these conditions let you walk away cleanly if your loan falls through or the building report turns up something serious. They don't apply at auction, where the contract is unconditional.
- Know your cooling-off rights by state. Outside auctions, private-treaty contracts come with a cooling-off period: NSW is 5 business days (about 0.25% of the price forfeited if you pull out), VIC is 3 business days (0.2% of the price or $100, whichever is greater), QLD is 5 business days (0.25%), and SA is 2 business days. WA has no statutory cooling-off period, and there is no cooling-off at auction anywhere in Australia.
- Negotiate from the inspection findings, not the asking price. A legitimate $8,000 repair list gives you a quantified anchor that "I think it's overpriced" never will.
Settlement (30 to 90 days)
Settlement is when ownership officially transfers from the seller to you. It usually happens 30 to 90 days after the contract goes unconditional, and the exact window is written into your contract of sale.
- Get formal (unconditional) loan approval. Pre-approval is not final approval. The lender orders a valuation and runs final checks. Chase your broker weekly, because delays here are the number-one cause of settlement extensions and penalty interest, typically around 10% per annum and set by your contract of sale.
- Pay the deposit, usually 10%, held in trust until settlement. It's released to the seller once everything settles, and it counts toward your purchase price, not on top of it.
- Take out home and contents insurance from settlement day, not move-in day. In most states the risk passes to you the moment contracts go unconditional or on settlement day, so if a tree falls on the roof before your moving van arrives, it's your roof. Sort cover early.
- Confirm the settlement adjustments. Council rates, water, strata and land tax are split pro-rata between seller and buyer to the day. Your conveyancer prepares the figures, so review them before you sign off.
- Do the final pre-settlement inspection 24 to 48 hours out. Walk through with the contract in hand and check every included fixture, appliance and chattel is still there and that no new damage has occurred since exchange.
- Know your repayments before day one. Run the actual figure through the mortgage repayment calculator so the first bill holds no surprises.
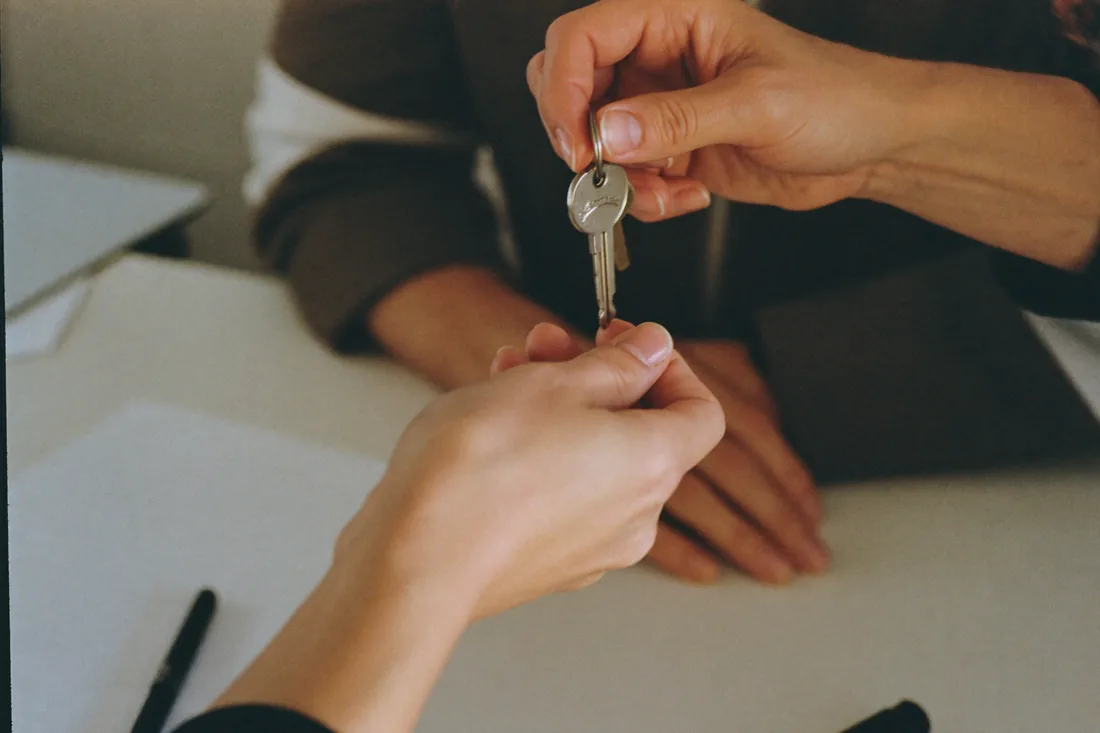
- Collect the keys. Funds clear, the title registers in your name, and the agent hands over the keys, usually from their office rather than at the property.
Post-settlement
- Switch utilities into your name from settlement day. Electricity, gas, water, internet and waste, ideally arranged a week ahead to dodge same-day connection fees of $150 or more. Our utility connection service can help you get everything set up before you move in.
- Book your removalist 2+ weeks ahead. Weekend slots in the capitals book out first, and a professional removalist runs $800 to $2,500 depending on volume and distance. Our free removalist matching service can help you find one.
- Redirect your mail with Australia Post. A short redirect catches anything sent to your old address while you update accounts and subscriptions.
- Set up council rates and any strata direct debits. First quarterly bills usually land within 4 to 8 weeks of settlement.
- Confirm your repayment date and offset account. If you have an offset, point your salary at it from day one, because every dollar parked there cuts your daily interest.
- Lodge any First Home Owner Grant application. Deadlines vary by state but most run about 12 months from settlement. Check your state's deadline on the relevant grants page.
- Diary a refinance review for 24 months out. By then repayments and any capital growth may have pushed you below 80% LVR, which opens up sharper rates and can remove LMI from the equation.
First Home Guarantee 2026: the per-state price caps
The First Home Guarantee lets eligible first-home buyers purchase with a 5% deposit and no LMI, with the government guaranteeing the rest. Since 1 October 2025 it has had unlimited places and no income caps (Housing Australia). There's a cap on what you can pay, and it depends on where you buy. These are the capital-city and regional-centre caps as of July 2026 (firsthomebuyers.gov.au). "Rest of state" areas have lower caps, so always confirm the figure for your exact postcode before you sign.
| State or territory | Price cap (as of June 2026) |
|---|---|
| New South Wales | $1,500,000 |
| Victoria | $950,000 |
| Queensland | $1,000,000 |
| Western Australia | $850,000 |
| South Australia | $900,000 |
| Tasmania | $700,000 |
| Australian Capital Territory | $1,000,000 |
| Northern Territory (Darwin) | $750,000 |
| Northern Territory (rest of territory) | $600,000 |
Since 1 July 2026 the NT has been split into Darwin at $750,000 and the rest of the territory at $600,000, so confirm which figure applies to your exact postcode. Not sure if you qualify? The eligibility checker and your state grants page walk you through it.
The bottom line
Buying your first home isn't really hard, it's just long, and there are a lot of pieces. Break it into stages, sort your finances first, get pre-approved, inspect properly, negotiate from facts and prepare for settlement. Each step builds on the last.
If you're not sure where you stand, the borrowing-power calculator gives you an honest picture in under two minutes, with no email required and no sales pitch. And if you'd rather see the whole road mapped out, your journey ties every stage and tool together in one place.
First home buyer checklist FAQ
How long does it take to buy a first home in Australia?
Usually around 9 to 14 months from the day you start sorting your finances to the day you get the keys. It's faster if you're already pre-approved and buying by private treaty, and slower if you're saving from scratch or winning at auction. The month-by-month checklist above maps each stage so you can see where you are.
How much deposit do I need as a first home buyer in 2026?
A 5% genuine deposit gets most first-home buyers in via the First Home Guarantee, which waives Lenders Mortgage Insurance. Saving 20% avoids LMI without any scheme. Use the deposit tracker to set a target and the LMI calculator to see what a smaller deposit might cost you.
Do I still need a 20% deposit to buy a house?
No. You can buy with far less, but a deposit under 20% usually means paying Lenders Mortgage Insurance, which can add $10,000 to $40,000 to your costs. The main exception is the First Home Guarantee, which lets eligible first-home buyers in with a 5% deposit and no LMI at all.
What is the First Home Guarantee in 2026?
It's a federal scheme that lets eligible first-home buyers purchase with a 5% deposit and no Lenders Mortgage Insurance, with the government guaranteeing the rest. Since 1 October 2025 it has had unlimited places and no income caps (Housing Australia). Per-state price caps apply. Check your eligibility with the eligibility checker or the grants page.
What documents do I need for a home-loan pre-approval?
You'll need two recent payslips, your latest Notice of Assessment, around three months of bank statements, photo ID such as a passport or driver's licence, and details of every debt and credit-card limit you hold. Self-employed buyers usually need two years of tax returns instead of payslips. Have it all ready before you apply.
How long does pre-approval last?
Usually 90 days, though some lenders cap it at 60. Start making serious offers inside that window, because once it expires you'll have to re-supply payslips, bank statements and other documents and go through assessment again. Avoid taking on new debt or switching jobs while it's active.
Is there a downloadable first home buyer checklist?
Yes, the printable quick checklist near the top of this page covers every stage on a single screen. Print it, screenshot it, or tick it off as you go. Each line links to the detailed step below, so you can use it as both a one-page summary and a launchpad into the detail.


